Wednesday 8 February 2012

Painting "The Hammers" and "Rhino" Part 2

I usually avoid painting and modelling hobby forums like the plague, but I like the people over on Fantasy Flight. I had forgotten how much until I posted the link to part 1 over on the modelling section of 'Dust Tactics'.

ZuggZugg and Psykostevo were kind enough to have a look, then take the time to share their thoughts. We are all of us agreed that this painting article about airbushing has really been co-opted by my unhealthy proclivity for weathering.

And now?

Some weathering, (and other stuff).


Step 1: Rusty bits!!!!

I splash a thin layer of MIG Rust Effects onto the patchy brown areas from the previous article. I allowed it to  dry, (for more than the 15 minutes recommended on the bottle) then applied a second coat. I don't want them to look too beaten up, just enough to show that they're fighting a war at close quarters so that's enough MIG for now :(

MIG rust effects. Liquid crack for weathering fanatics.
Step 2: Skin

I used Vallejo Carmine Red, Yellow Olive and Medium Fleshtone in various combinations. There isn't much skin on these units, so it doesn't take long!
Colours for the skin
 The first coat is a thin, 60/40 mix of carmine red and medium fleshtone into the recesses and lines of the face. The picture below is rubbish and fails quite spectacularly to represent in any way exactly how livid, the red should look. Essentially, it should look like the average 'Geordie Shore' sunbed victim after a particularly strong dose of vitamin chav at the local melanoma shop.
Not a great picture
 The next coat, (once the first is completely dry) is a similarly thin 60/40 mix of Yellow olive and medium fleshtone over the red areas, but not completely obscuring them. The green cools the previous layer down somewhat and gives the skin a (slightly) more natural look.

A slightly more healthy look. If you're very, very ill.
 Once that layer is dry, medium fleshtone is used to tidy up any mistakes and bring the colour back up to something approaching normal on the raised areas. Finally, Vallejo 'Flat Flesh' is applied to the uppermost raised areas in a thin layer. Once the layer's dry completely, (I recommend leaving them overnight, even for GW equivalent colours) a thin layer of GW Devlan Mud is mixed with Vallejo mixing medium, (glaze medium) and applied to the skin areas.
Skin's more or less done.
 Step 3: Finishing touches

The metal and armour areas are washed in a thin layer of GW Badab Black wash. I find that this ties the colours together nicely in a dark scheme as well as making weathering and decals look more natural.
Just been washed with Badab Black.
 Step 4: Basing

I apply a thin layer of Vallejo Brown Earth to the base with an old brush, taking care to apply only a small amount to the soles of the models boots and slightly around the edges. My goal is to simulate the mucky slush that results from a large, heavily armoured warrior trudging around in it.

Snow is only truly white on Christmas cards.

It's brown. It's earth. It's....Brown Earth...
GW snow is applied using a thin layer of PVA. It was the first time in my entire modelling history of 11 years that I used static snow and I really misjudged it. It more or less stuck to all of the brown earth, which was not what I intended. I wanted to leave slushy, muddy tracks around the soldiers' feet and footprints, but I can always go back later and add a bit more mud.

The circumference of each base was painted with GW Astronomican Grey foundation paint.
 
Done.
 
Step 6: Rhino's quiff (and eye patch)

Rhino is the only one of the models in this article with hair, so he gets his own section in the post.

I applied a couple of thin layers of Olive Drab as a basecoat; gradually mixing adding and blending Flat Earth up to Khaki Grey, (all pictured).

I focussed the extreme highlights on his quiff and above the sideburns. I was basing him on Marvel's Nick Fury.

Makes Nick Fury look like Nick 'slightly peeved'
The finished article:

I need an alternative to my camera phone...

I hope this was useful to somebody. The airbrush is a great hobby tool, but ZuggZugg was onto something when he asked if my weathering was masking the true effect. The answer is yes, to some extent. The main problem is the quality of my pictures. The airbrush highlights have given the armour a really authentic look to the naked eye and I'll certainly be repeating it with my other armoured infantry.

That is once I've finished the onerous task of adding brown earth and snow to the entire contents of the original Dust Tactics boxed set.

I knew I should have based them properly as I went :(

Thanks for reading.

Saturday 4 February 2012

Painting "The Hammers" and "Rhino" Part 1

It's time for me to get back to what this blog should have been about in the first place: my hobby.

It's dead easy to take a pop at the big games companies out there. When an organisation reaches a certain size, accumulates a particular mass, or otherwise grows to the point where their customers develop a sense of ownership, then your entire operation is more or less available for scrutiny by Joe Internet et al. I never intended to become one of those naysayer, herophobic people that use the net to criticize those that create and so it's goodbye to vitriol, (for a while at least).

I actually paint, build and play a lot more than my blog entries would suggest. It's just that there are so many other great hobby blogs out there, (A gentleman's ones and Colonel Schofer's OCD model blog to name but a few!) that I didn't see where my humble talents really fit in. I now appreciate the fact that blogging isn't about 'Cool mini or not' level painting on every outing. Many people can produce great hobby articles without actually producing something of the 'Chest of Colours' calibre, although that isn't to say that we should stop trying...

I haven't done a painting article since the Axis robots, so it's time to return to my favourite boardgame, Dust Tactics to share my first attempt at using an airbrush to paint small, heroic scale figures, (Obviously, I can't use the airbrush to paint every single part of the model, but it's still a fantastic tool to have in your arsenal!). What

I will warn you, is that this is not a tutorial! It's just a log of my experiments with airbrushing. If you want a fantastic airbrushing tutorial, then watch the Andrea Miniatures video where they paint 'The Old Fiddler'. This article is 'warts and all'. I've documented my mistakes, so that other novices can learn from them.

Here's the paint list:


Vallejo
Yellow Olive
Gunship Green
Medium Olive
Lightgreen blue
Flat Brown
Flat Earth
Oily Steel
USA Olive Drab
Khaki Grey
Medium Fleshtone
Flat Flesh
Vallejo thinner medium


GW
Thraka Green wash
Devlan mud wash


Before starting this experiment, I looked for info regarding the exact tone used for the primer. The closest match that most people suggested was 'Catachan Green', but I found that Vallejo Olive, (while noticeably darker than the primer) just suited me better.


Step 1: I mask the decals with Blu-tac.

Always have some Blu-tac on hand when airbrushing. It's more malleable and versatile than masking tape, but remember, tape will always give you a crisper, neater pattern than Blu-tac, (see my 'Axis robots' article for details).

Blu-tac masks the decals
 Step 2: I inexplicably spend the better part of 15 minutes painstakingly masking the exposed skin areas...

... which have not even been painted yet.

You may also notice that I made an error at this stage. I had initially intended to spray the rubber kneepads with USA Olive Drab, in order to break up the armour area. Unfortunately, I had either gotten water into the mix, or else used too much thinner with the small amount of already thin paint. Either way, the colour simply ran off the target area as my airbrush spat water out in between fitful spurts of paint. Any suggestions as to how this could have happened would be greatly appreciated!

This step is optional and not recommended.
Why did I mask their faces when they hadn't been painted yet? I have no idea...
Step 3: I re-engage my brain and spray the mitts and backpack fins with Khaki-Grey; a versatile colour that you GW enthusiasts can associate with a darker, thicker, snakebite leather, (if they still make that). The colour was mixed with a small amount of Vallejo thinner medium in order to ensure a smooth, even flow of paint.


Mits and fins sprayed with Khaki Grey, (background)
Step 4: Mask the painted fins and mitts with Blu-tac, (See picture in next step).

Step 5: Watch 'The Old Fiddler' to see how this is really done, but here is my attempt at shading the model by short, sharp blasts of 'Gunship Green' from a 45 degree angle below the target. If your mixture is good, as well as your angle, (it's honestly very intuitive. Trust me.) then you should end up with the recesses nice and dark, but with a smooth blend between it and the base colour.

Shading from below. I actually managed to do it!
 Step 6: I mix Yellow Olive with the first highlight, medium olive.

This is why I prefer the open pot, Bottles are a hassle for relatively detailed work, but are great for painting large areas, or priming.

Mixing Gunship Green and medium Olive in the cup.
 Step 7: I spray the highlight from above in a variation of the method used in step 5.
Highlights sprayed from above.
 Step 8: I spray on a small amount of the nefarious, 'light green blue' which I have always been dying to use, but have never had the opportunity.

My airbrush spat again at this point, but it wasn't a total disaster. Once I had cleaned it out and achieved a more even flow, I repeated the step. It was neater, but I now had a slightly brighter model than I had anticipated.

Ah well...
Highlighted with a gentle spray of light green blue, from above.
Step 9: I use a blister sponge to apply 'flat brown' to the edges of armour, mitts, fins and exhaust vents. I also dab it on the unpainted fingers of each clenched rocket fist.

Weathering on Flat Brown with some blister sponge.
jetpack and rocket on rocket fist). I then use an Army Painter character brush to apply chips of Oily Steel to the already weathered brown areas in random patterns.
Metal areas painted with Oily Steel, which has also been added to weathered areas as 'chips'.
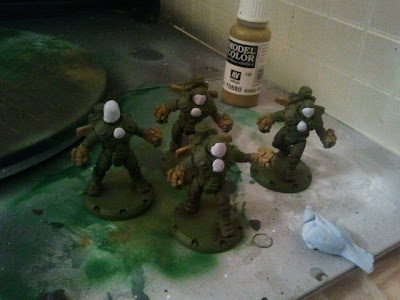
 Step 11: I add the base colour for flesh, ('Medium Fleshtone') and the base colour for the skullcaps, (Flat Earth). Once these are dry, I highlight the skullcaps with a mix of 'Flat Earth' and 'Khaki Grey'.
Flesh and skullcaps given their base layers.
 Step 12: I wash the green armoured areas with Games Workshop 'Thraka Green' and leave it to dry overnight.
All green armour areas washed with Thraka Green.
More to come once the Thraka dries in. Thanks for reading!